Kubernetes is perhaps the orchestrator if you have decided to deploy your containerized microservices in production. In this post I will talk about K3s a stripped down version of Kubernetes and the steps to install it on Amazon EC2 A1 instances.
I choose A1 because they deliver significant cost savings for scale-out and Arm-based applications such as web servers, containerized microservices, caching fleets, and distributed data stores that are supported by the extensive Arm ecosystem. And this goes well with the light-weight K3s flavor of Kubernetes.
k3s is a fully compliant, production-grade Kubernetes distribution that maintains an absolutely tiny footprint. Weighing in at less than 40 MB, it only needs 512 MB of RAM to run. This means it's perfect for all kinds of computing that requires a minimal about of memory and space.
k3s is designed for Edge computing, IoT, CI, and ARM. Even if you're working with something as small as a Raspberry Pi, k3s allows developers to utilize Kubernetes for production workloads. It simplifies operations, reducing the dependencies and steps needed to run a production Kubernetes cluster.
Installation is a breeze, considering that k3s is packaged as a single binary with less than 40 MB. However, security isn't an afterthought, since TLS certificates are generated by default to make sure that all communication is secure by default.

Installing K3s on Amazon EC2 A1 instance type
Launch Amazon EC2 A1 instance type with Debian 9 as the operating system. Then ssh into the node and proceed with the following-
#Install K3s
curl -sfL https://get.k3s.io | sh - |
# Check for Ready node, takes maybe 30 seconds
k3s kubectl get node |
Default k3s doesn't assign roles to the nodes and allows for pods to be scheduled on the master. If you want you can change that with the following commands:
# label node as master
kubectl label node mymasternode kubernetes.io/role=master |
# exclude master from scheduling pods
kubectl taint nodes mymasternode node-role.kubernetes.io/master=effect:NoSchedule |
On the slave nodes run the following commands:
curl -fSL "https://github.com/rancher/k3s/releases/download/v0.1.0/k3s-armhf" \ |
After that you start the agent
# NODE_TOKEN comes from /var/lib/rancher/k3s/server/node-token on the master
sudo k3s agent --server https://myserver:6443 --token ${NODE_TOKEN} & |
Optionally you can also set a label for the node. The commands should be run from the master node
kubectl label node mynode kubernetes.io/role=node |
You can add more slave nodes as well if you want using the above steps.
You are now ready to run a pod. As first pod to run I chose Nginx. Create a file at /home/admin/nginx-test.yaml with the following content
--- |
Next step is deploying to the cluster
kubectl apply -f /home/admin/nginx-test.yaml
Since this is a NodePort service, k3s will open a port on the A1 instance at port 30123 and you will be able to see the default Nginx page on browser.

Installing Kubernetes Dashboard on Amazon EC2 A1 instance type
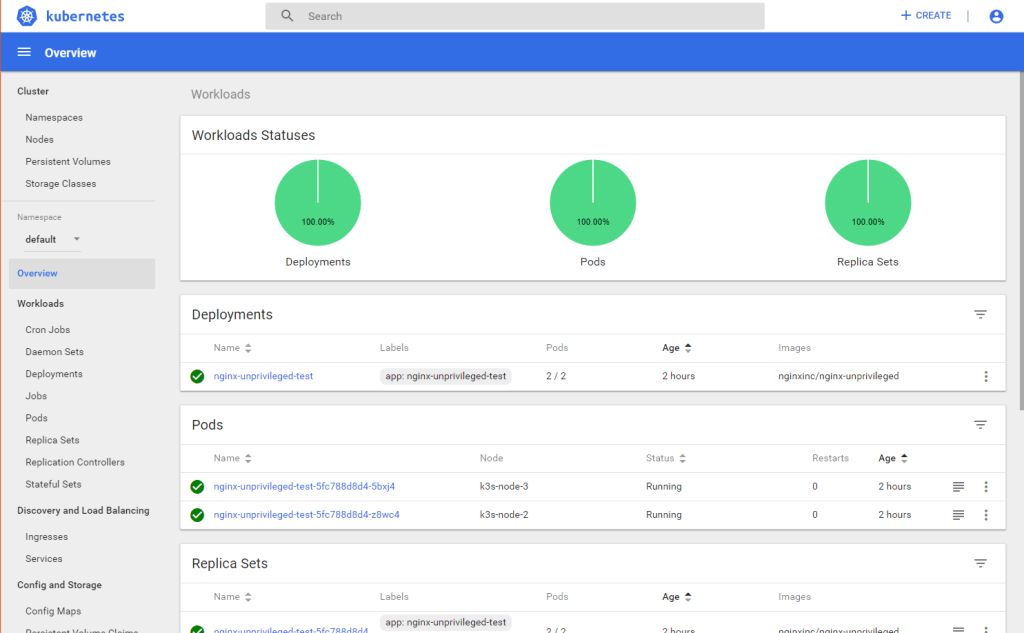
So now we have installed Kubernetes and got a pod running. Let's move on to install a dashboard and a load balancer.
admin@k3s-master-1:~ $ kubectl get nodes |
To install the Web UI (Dashboard) we will need to download the kubernetes-dashboard.yaml
curl -sfL https://raw.githubusercontent.com/kubernetes/dashboard/v1.10.1/src/deploy/recommended/kubernetes-dashboard.yaml > kubernetes-dashboard.yaml |
and changed the image as it was pointing to the amd version and replaced it with the arm version.
spec: |
After that I copied the yaml file to the /var/lib/rancher/k3s/server/manifests directory and the pod was created. To access the pod you have to run the command kubectl proxy. This makes it possible to access the dashboard from the local host only. It is possible to access the dashboard from a machine out of the cluster. To make it work you have to setup a SSL tunnel.
ssh -L8001:localhost:8001 <ip-address of the master> |
After that you can access the dashboard via this link: http://localhost:8001/api/v1/namespaces/kube-system/services/https:kubernetes-dashboard:/proxy/
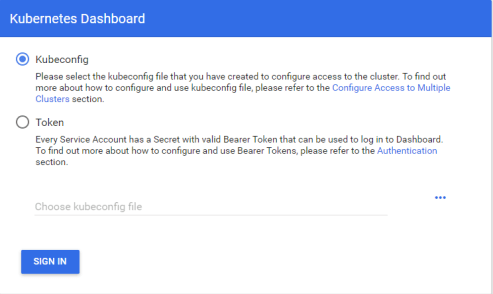
In my environment, I have selected the option Token and followed the instructions for creating a token as described here. As they mention there it is a sample user with all permissions so in productions you would have to make other choices.
The next step is adding load balancing. Out of the box you can use nodeport to expose ports to the outside. This has however limitations. This is covered in a separate post here.
No comments:
Post a Comment
Hi, Leave a comment here and one of the binary piper's will reply soon :)